Wednesday, August 30, 2017

Scouts added to US Team Yankee list

SCOUTS OUT!

The cavalry has arrived!
For the rest of the campaign, US players can field Scout Sections in their formations. Each formation can add two Scout Sections for 2 points each.

SCOUT SECTION 2 POINTS

A Scout Section has one M113 from TU105 and one M901 ITV from TU106. The unit has the Scout and Spearhead special rules.

This unit is based off the US interim 1983 battalion scout platoon. This book has great information about US cavalry and scout units through the 20th Century.

http://www.dtic.mil/dtic/tr/fulltext/u2/a214798.pdf


Sunday, August 27, 2017

Last Stand of Tank 66

THE LAST STAND OF TANK 66

50 POINTSINTRODUCTION
8/26 Note: This action use to belong in my earlier battle report about the Battle of Hill 214 which I published on 8/14. I decided that I should separate this part of the report and make it its own report because Petraredhammer won these games and deserves the credit for them. So I decided to pull these three short games out of my old report and place them here. Now on to the report.
This report is the first round of games that me and my son, Jeremy (Petraredhammer) played a couple of weeks ago. Both of us were pretty new to Team Yankee, so we decided to try out the Team Yankee campaign in the main rule-book. Today's fun and games revolved around three games of ¨The Last Battle of Tank 66¨ and a later we played a single game of ¨The Battle of Hill 214¨.
For the first round we decided to play the Tank 66 scenario with the winner being the player who could win best two out of three. It is a neat little learning scenario and it would also turn out to be a tough round of games for both of us because of the small number of teams involved. The scenario is based off a small engagement that pitted Team Yankee´s CO Captain Bannon and his 66 tank against a full platoon of T62s. Unfortunately the T62 hasn't made its appearance in Team Yankee so a trio of T72s are used instead. That does make for a much tougher game for the US player.

ROUND 1

Round One was a target shoot for my tank. My opening shots scored hits on two of the T72 leaving one in flames and the other bailed. Petraredhammer was able to remount the disabled tank and rushed forward to engage my lone tank. He then scored some hits, but neither penetrated. The second turn saw my gunner hit his stride with an excellent display of gunnery. Two hits scored and two T72s in flames. This round was a total win for me as I trashed all three of his tanks in two turns. Things weren't looking looking good for the Soviets.

ROUND 2

Round two was a lot rougher for me. My gunner (and my dice) cooled down and just couldn't seem land home telling shots. I took out just one KO´d one tank and bailed another. Petraredhammer quickly remount his bailed tank who then proceeded to obliterate my lonely M1 in a nasty platoon volley. It just wasn't pretty.
The Soviets get some payback

ROUND 3

Round three just wasn't much of a contest for the Soviets. My shooting just plain sucked. My opening volley bailed just one tank who promptly remounted. Petaredhammer returned the favor and took me out. We didn't even make it to turn two!
It just wasn't pretty...

CONCLUSION

Game, set, and match!
Overall I did okay killing four T72s for a loss of two M1s. However Petraredhammer pulled the best out of three and so came out as the clear winner in these actions. We decided that this gave him the extra 3 tank company for our next game: the Battle for Hill 214.
Nothing left to do now but watch the Soviet victory parade.
Time now Charlie Mike.
WARSAW PACT

The M1 Abrams in Team Yankee

I have to say that the is my favorite team in Team Yankee is the M1 Abrams. I was a DAT in my younger days and the Abrams is like a first love to me. Granted my time was on the much improved M1IP and the M1A1. I´m hoping that these pigs will be coming along in the up coming Stripes book, but we´ll see.

With that you still get a lot for the basic pig, but you pay a lot for her too!

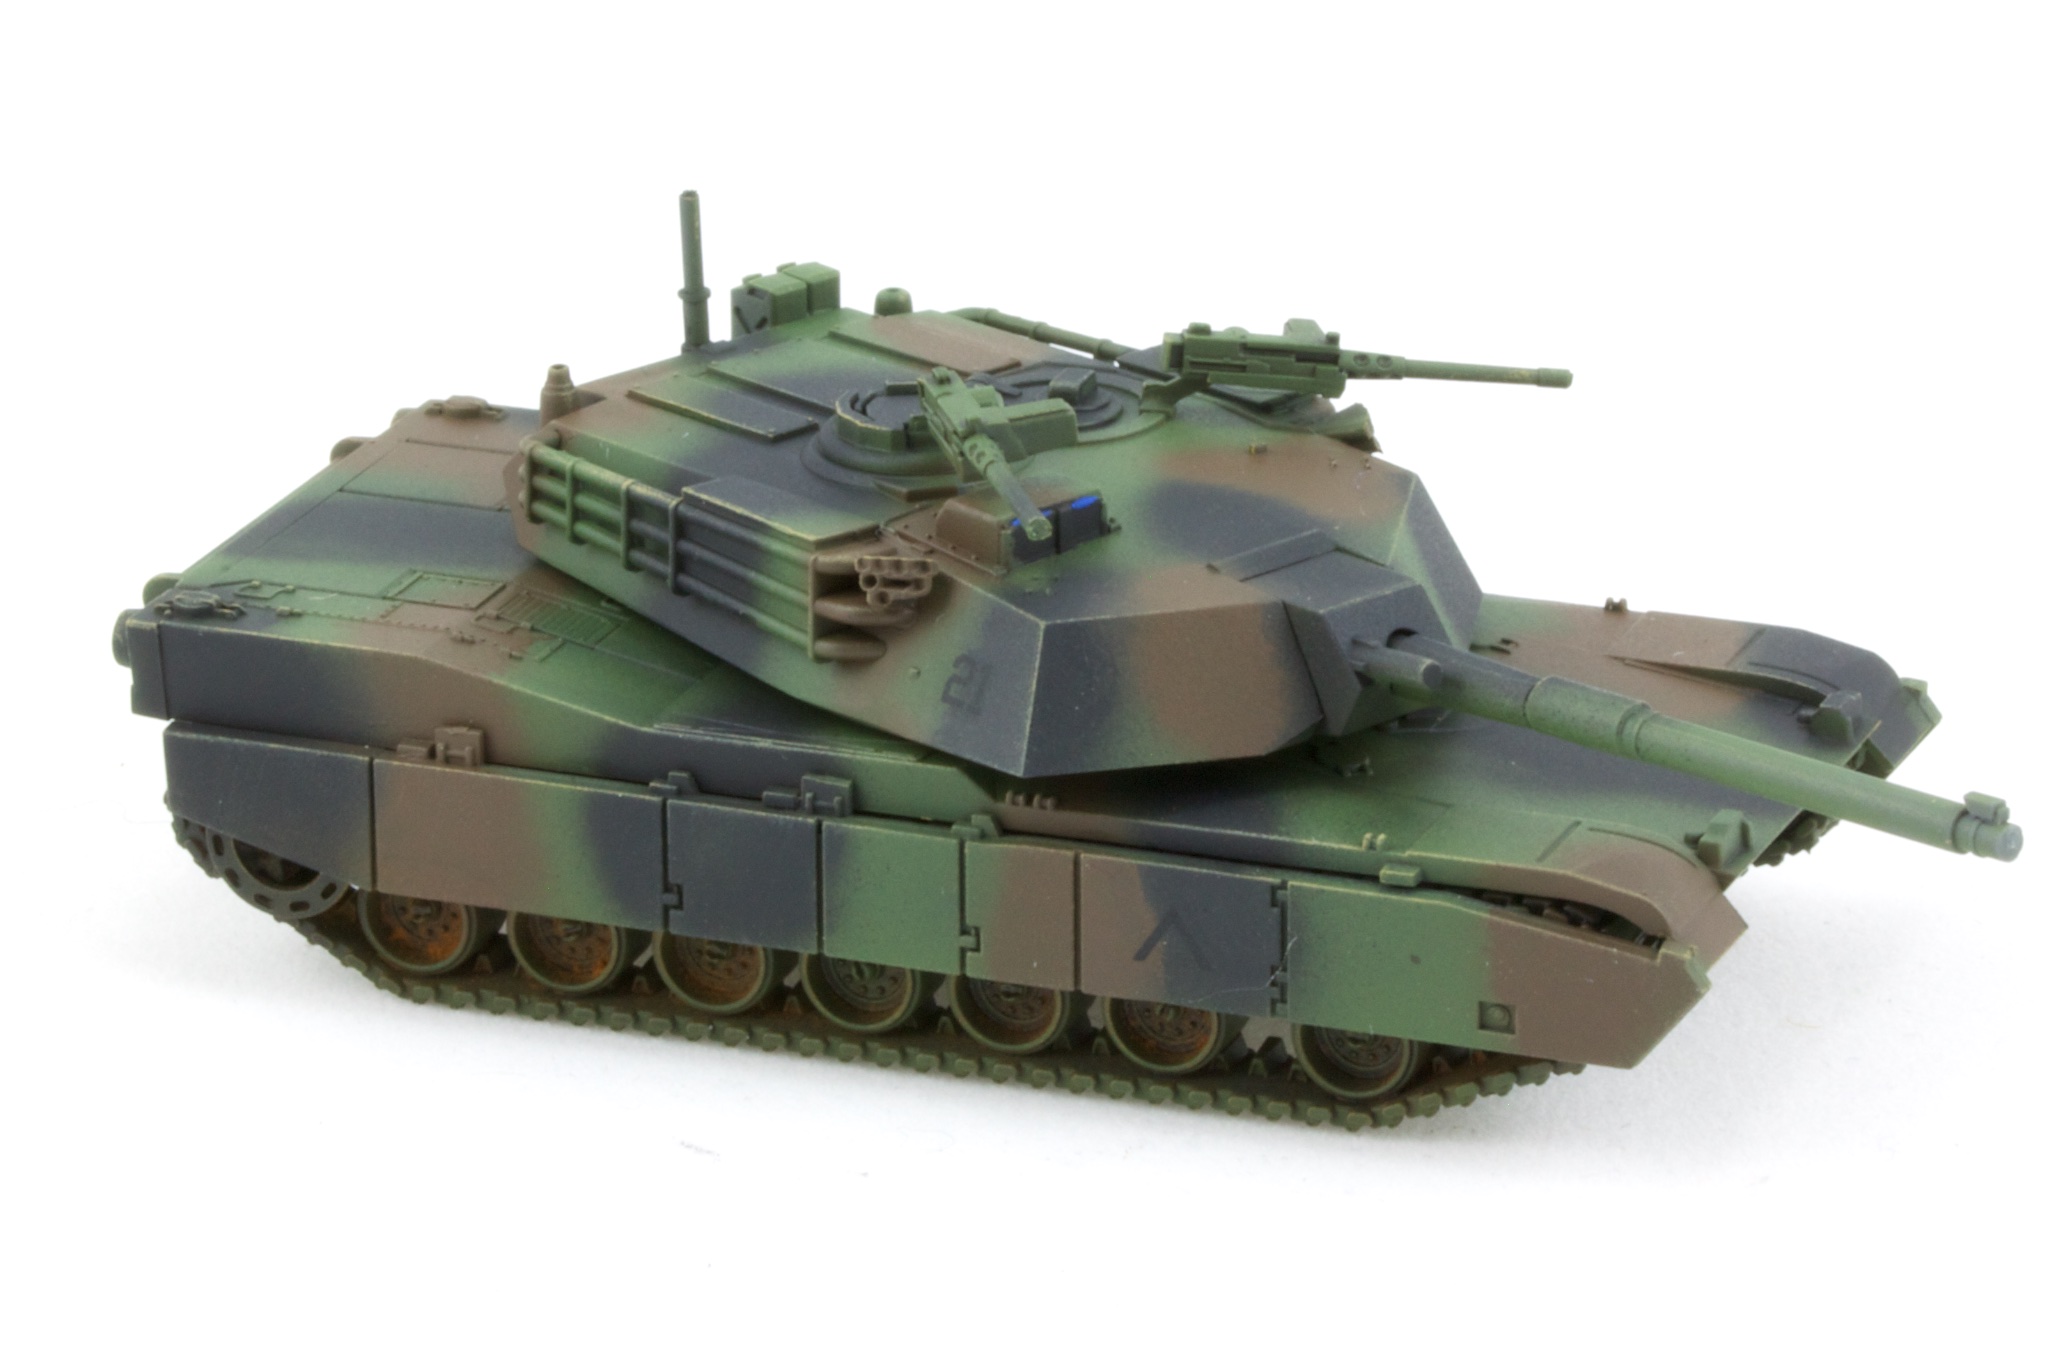
<img src="http://www.flamesofwar.com/Portals/0/all_images/TeamYankee/American/Cards/TU102.jpg" alt="The American war pig!" />

What a sweet ride. You have the best mobility in the game with a 14¨ tactical move and a 2+ crossing. Heck, on a 4´ by 4´ table there is little need to dash! That 14¨ will get you nearly anywhere you want to go. The thermals, advanced stabiliser and the laser range finder allow you to engage targets at range while moving fast and to do so accurately in the dark! What a scary combination! Armor wise you have some of the best in the current game with 18 points of Chobham armor. The gun also has a ROF of 2 which allows an Abrams platoon to toss out as much hurt as a Soviet company.


However there are two things that keep it less than perfect. The first is the M68´s lack of punch. 20 AT is pretty respectable but it struggles against the front armor of the T72. You´re looking at kills on 1-3, a glancing hit on 4, and bounces on 5 or 6. That´s pretty decent but range can really cut into that as your foe gets to add +1 for shots over 16¨. The T64 makes it even worse with its 17 armor. Oh do I wish I had the M256A1! Imagine an M1 with an AT22 and you´re getting the gist.


The second bad point is the Abrams´ cost and unit organization. Each Abrams you take eats 8 points of your force´s cost. That´s 8% of your point pool in a 100 point game. That weighs even heavier with lower cost forces. Now granted, the Abrams is cheaper than the Leopard 2, but it is still one of the most expensive teams in the game. You also have to consider that you can only field them in platoons of 2-4 teams each. Platoons of 3-4 cost a pretty penny, but you do get some endurance for casualties. I would avoid 2 team platoons if you can, and avoid 5 tank companies like the plague! There is nothing worse then losing a tank, going to ¨Bad Spirits¨ and then losing another tank (and the unit) on a roll of 1-3! OUCH! In fact, kill just a mere two tanks in that 5 tank company and you have a good chance of wiping the whole thing out in just ONE shooting phase! They are just too brittle!

The key to using the Abrams is to know its strengths and to use them. You have a very mobile direct fire platform that´s going to hit more often than not. Use that mobility to set up good shots! The best are on the flanks of course! There is nothing worse for a Soviet player than to find a full platoon of Abrams tanks set-up with flank shots on their tank companies. That means a 3+ to hit and 2+ to kill on 8 shots!!! It´s extremely to get flank shots in this game and that 14¨ tactical move gives you a better chance of getting that shot. So don´t be afraid to maneuver at range and seek out those shots.


However I´m really starting to warm-up on the M901 ITV. More on that track later.

Saturday, August 26, 2017

SECOND BATTLE OF THE HOFF!

SECOND BATTLE OF THE HOFF!

50 POINTS

INTRODUCTION


Today me and my son played one of the Quick Missions as part of our Red Thunder campaign. We don´t have a lot of units ready to play with so a 50 point Quick Mission seemed to be the very thing. In this action we moved a bit south of the border to fight Scenario Six: Seize the Bridge! So this battle is happening along
Autobahn 72 where it crosses the Sächsische Saale.

The bridge across the Sächsische Saale

DEPLOYMENT


The US deployment zone was in the upper right quadrant of the battlefield with the bridge 8¨ from the centerline. This just happened to be in a block that was roughly formed by the Sächsische Saale and Autobahn 72.
I placed my two platoons of mech infantry into blocking positions defending the village and extending down to the hill on the south side of the river. One place to note is the tall house on the north bank. I placed two Dragon teams in the top floor. As it would turn out they would have quite the view of the battlefield and would play a key role in the upcoming action. My ITV platoon was in hull down positions along the hill so that they had good fields of fire to the north and the west, just in case the Soviets had a reserve to flank my line. I kept my 113 tracks in covered positions near the river and behind the forest. I wasn't too sure where the best place was for my Abrams platoon, so I kept them close to the bridge so they could redeploy on command to the north or west. In essence I had a nice castle style defense clustered around the bridge.
Jeremy´s force deployed in the opposite corner of my position. He told me later that his plan was to cross the river with his BMPs and turn my flank. As that was developing he was going to maneuver two tank platoons along with the dismounted infantry through the center and pin my forces in place to support the flank assault. It was a pretty imaginative maneuver, unfortunately it didn't really go off as planned.

THE BATTLE: PHASE ONE


Jeremy opened the battle on Turn 1 by sweeping his tank battalion forward into the middle of the battlefield. He had a rough time with shooting because my grunts were dug in deep in the village. Getting sevens is pretty tough and nine tank shots just couldn't carry it off.
My return fire was a lot better though. During my movement phase I rushed my tanks across the bridge to take up flanking positions. I was able to get my lead tank into firing position and he blasted one of the Soviet tanks. My ITV platoon joined in the fun by trashing one tank and bailing out another. My Dragons hiding in the tall building we able to pop off some rockets but none could get through the tough hide of T72.
Turn Two was pretty much a wash for me but Jeremy´s luck seemed to improve. Jeremy moved his BMPs into position to cross the river and repositioned his tanks to mass his guns. He also rushed his infantry forward to flank his tanks and to try to engage my tanks. His shooting warmed a bit with an excellent shot that plastered one of my ITVs and a company massed fire into my tank platoon which bailed a tank. I managed to remount my tank and rushed the remainder of the platoon into position to support the lead section. My trailing tank slowed a bit and took up a firing position on the bridge. My lead three tanks opened up and scored six hits on Jer´s tanks! I just knew that I had him... until he started making armor saves. The kid´s dice were on fire! He passed every test except one and I whiffed the firepower check and just bailed a tank. My ATGMs just couldn't get their act together! Dragons and TOWs flashed through the air and didn't even come close.


Sort of like that but nowhere near as cool.
Turn Three was a nightmare for Jeremy! I switched off dice and that seemed to do the trick for me. Jeremy started the turn by crossing the river with his BMP company and by rushing up his infantry. The tanks wiggled a bit looking for shots but pretty much stayed in the center of the table under cover. Unfortunately his dice went cold again in the shooting phase. He tossed cannon shots at my tanks, the Dragon team in the building, and he plinked a shot or two at the ITV. Nothing worked for him! The shots at the missile teams went wide and the shots at my tanks just bounced off the Abrams´ thick hide.
My luck couldn't have been more different! His BMP company moved into my engagement envelope for the ATGMs and I let them rip. I guess my gunners just needed to warm up a bit! TOWs and Dragons flew true this time and slammed home into the bimps. My tank joined into the fun by placing two HEAT rounds right into the lead carrier. When the smoke cleared three out of the four carriers were brewed up and the fourth failed his morale check. In just one short firing phase Jeremy got to watch his main battle plan go up in flames. My tank gunners on the flank joined in a took out another T72. Yeah, six shots, again, only managed to bag a single tank. Still though, things were looking great for me. I took out his  whole (under strength) BMP company and 4 T72s . The Russian force was really hurting with only 5 tank runners and the motor rifle company´s dismounts. I just knew that I had the game in the bag.

THE BATTLE: PHASE TWO


UH-OH!

That´s when Jeremy changed strategies. On Turn Four Jeremy turned his force 90 degrees and moved everything right toward my thin line of Abrams. He did make one major mistake: he didn´t keep his infantry in cover. The grunts swarmed across the open field near my infantry and I took advantage. Three SAW teams dropped a bucket of dice on the Soviets and Jeremy´s sucky luck did the rest. Soviet motor riflemen went down in heaps with only three teams surviving my fire.
One Turn Five Jeremy´s tanks also raced forward and everyone poured fire into my tank platoon and they were hitting too! Every single tank in my platoon took a hit and I knew I was hurting now- I´m terrible when it comes to armor saves.

However my luck held, sort of. Only one of my tanks died, but two more were bailed. Jeremy followed up the cannon fire with a rush of infantry. My surviving tank raked the infantry with fire but it just wasn't enough. One RPG team died but the rest made it though and assaulted my tanks. The two bailed tanks died and the survivor managed to fall back. Unfortunately the tank platoon was in ¨Bad Spirits¨ and had unit morale check on a 4+. If I botched that roll then the unit would be destroyed and that could hurt my victory points. I passed with a four! Talk about no margin for error! It was then that the timer called the game!

AFTERMATH!


Jeremy was sooooo close! He infantry had pushed through my tank platoon but just couldn't close the distance. To deny me a victory he had to be within 8¨ of the bridge. He closest team was 10¨. So close, but so far.
I managed to destroy one of his units (the BMPs) and he almost got one, but that platoon still had one runner! So a 6-1 win for me.
Honestly Jeremy could have won the game if he got moving on the bridge earlier. He just deployed too far away from the bridge and he spent too much time and focus on the BMP company and its crossing. My castle defense worked perfectly though. My units were in mutually supporting positions and I maneuvered my units aggressively rather than staying static. Maybe I was too aggressive... my tanks were exposed, bailed, and too close to the Russian infantry. Next time that could cost me! I also didn't do a good job massing my fires and destroying enemy units. I spread out my shots too much and that could have hurt me too. Team Yankee doesn't care too much about killing teams, you´ve got to kill UNITS to get on the score board.
On the whole, a great game and one well fought by the Russians/Jeremy. So on to the next theater!
Time now Charlie Mike.

He was that close!

Saturday, August 12, 2017

Team Yankee: Clash at Hof!

CLASH AT THE HOF: THE BATTLE OF HILL 214


50 POINTS


INTRODUCTION

Today I got to play against my younger son, Jeremy (aka Petaredhammer) in a series of tank on tank clashes in the Hof Corridor. This report covers the second battle from the Team Yankee campaign in the core rulebook: the Battle of Hill 214.
What an ugly place, and a night action to boot! I have to say that this was the ugliest slugging match
I've played in some years. Both sides really dug in their heels and gave it their all. This game took us two hours to play. Granted there was a lot of rules research, but on the whole it was a game full of maneuver and play and that is despite the US being fixed to defending one objective.
I deployed the two short tank platoons in the two clumps of trees facing north and the M113 carrier platoon facing south and deployed in the woods south of the objective. The dismounts were in ambush.
Petaredhammer placed his infantry in the town and the the bulk of his tanks were set up in the top right hand corner. He also placed the battalion command tank on the road near the village to support the infantry.
Because we were short tanks we decided to keep one 3 tank platoon off board until he had lost three total tanks. As events would have it these tanks appeared on turn four.
Since we couldn't find rules that told us otherwise we decided to roll for initiative each turn.
Hill 214 and its surroundings

PHASE 1

Turn one opened with me winning initiative! I quickly went on the offensive and fired my maneuver platoon at the Soviet battalion commander who was sitting on the road, all by himself!! A 6 gave me a 24¨ engagement range (this was a night action) and I went for it, burying the Soviet colonel under an avalanche of SABOT rounds. My command platoon immediately picked up a 24¨ engagement range and opened up on the two small tank companies that were north east of my position. Yeah... that didn't work out so well. I managed to bail just one tango.
At the bottom of turn 1 Petaredhammer remounted his bailed tank and managed to get his CO into another tank with a lucky die roll. Both tank companies rushed forward in a solid phalanx! It was a lovely sight.... too bad the lead company nearly blocked out trailing company!!!! The No Line Of Sight rule on page 40 can be a real pain. Still Petaredhammer soldiered on and fired what he could. Yeah, Soviets firing at US tanks at night and concealed in woods. Petaredhammer just couldn't pull the sixes he needed to score a hit.
Turns 2-4 were times that tried men's souls, or at least my son´s! My M1s stayed on target and started picking off his T72s, one after another. Petaredhammer was landing hits too and was slowly whittling down my armored force, but I was getting the better of the exchange! Concealment and night with thermals gave me the edge in this tank action. The Soviets just couldn't match the Abrams tank shot for shot. Turn 4 was the worst as my M1s took out three tanks in one shooting phase! Petaredhammer realised that he was going to lose unless he changed tactics and quick!

PHASE 2

Around Turn 5 he FINALLY started doing something with his infantry. It wasn't anything particularly clever, but it was enough. Soviet infantry, in swarms, began to emerge from the village and drove like a hammer towards the objective. I rushed my dismounts into position from ambush to join a short skirmish line being formed by the small carrier platoon. Together the grunts and tracks began to pour a weathering fusilade of hot lead into the advancing crunchies. That's when I realised just how nasty a 12+ team platoon with a 3+ save really can be.
I poured fire into them but they just kept coming! By turn 7 they were in position to storm Hill 214 itself, but I was determined to stand! A blistering defensive fire phase saw off the first Soviet rush, but those stubborn commies rallied with a roaring ¨URRAH!!¨ and rushed my position again, this time supported by a fusilade of their own. Bitter hand-to-hand fighting raged along the length of Hill 214 and when the dust cleared the Soviets stood victorious. My infantry teams were wiped out and one of my M113s was engulfed in flames. However the hill was littered with dead and dying Soviets. My surviving track tried to rally, but failed. My left wing was totally crushed!
So I did the only thing that I could. I ordered my surviving tank to ATTACK! The Abrams rolled forward and poured a terrible volley of SABOT rounds into the surviving T72s reducing the survivors to burning scrap in a superb demonstration of advanced gunnery (SFC Lemon would have been proud!). My last runner then turned on the next turn and poured a savage volley of machine gun fire into the mob of Soviet infantry, forcing them to retreat (well, not really. I just killed off the lead teams that were on the objective).

CONCLUSION

At that time me and my honorable opponent decided to call it quits.. it was time to head home. He was now down to just the dismounted infantry with 7 teams left and I just had a single M1 who was my company commander. Odds are that I would have failed my formation morale roll (I'm terrible when it comes to rolling just one die, just horrible). But Petaredhammer pointed out that his force was hanging by a thread too, so we called it a hard fought draw.
It´s really too bad that I got to the game store with a dead phone. It was an intense game that would have made for some great visuals. Granted, most of the models were unpainted, but still, it was a visually amazing game (note: the pictures in this article are recreations). It was also a bitter and hard fought action to say the very least.
If the rest of the campaign winds up like this then we are in for an awesome ride!
Time now Charlie Mike!